
10 Best DIY's which you must try
We all have so many unused and discarded items lying around waiting to be sold as scrap or thrown away. It is such a liberating feeling once you are able to shed-off the so-called junk lying around.
However, before you finally call them off, we want to tell you that there are some unbelievably creative DIY (Do It Yourself) projects that you can do using a lot of this apparently useless stuff. In this article, you are going to learn some great items that you can create using some of these useless items.
You really do not need to be a genius to innovate! Here we will be discussing easy DIY projects most of them made with recycled materials that will help you decorate your home and recycle different materials.

You can make a nice necklace and matching earrings, with paper beads made from old magazines or the gift wrap paper. You should arrange for more paper than you initially think to start with since you will surely want to make more accessories with these to gift to your friends. Combine them with wood and glass beads to make them look more colourful.
You will need following things:
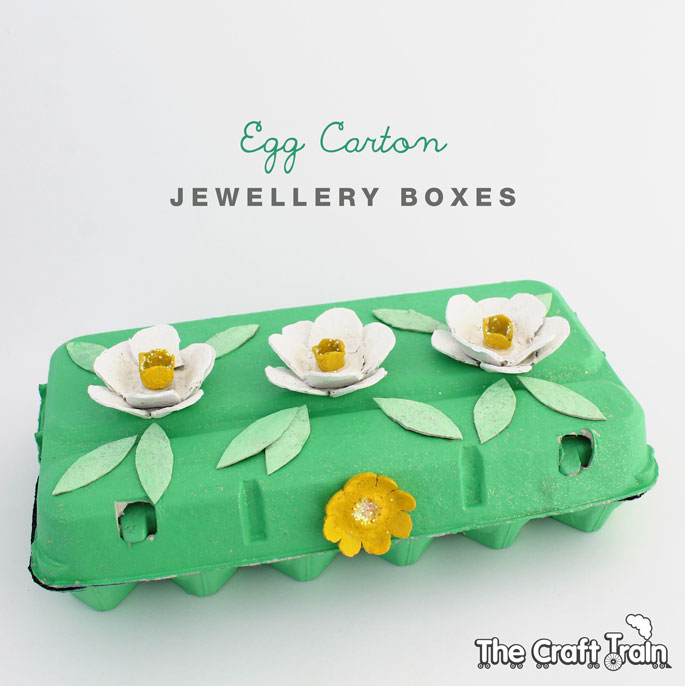
You can organize and store your jewelry using the egg cartons. Clean egg cartons can serve as excellent and economical jewelry box. The spaces in between can be used to store jewelry such as necklaces, bracelets and rings, and the protruding columns can be utilized to hang the earrings. To make them look beautiful and pleasing to eyes, you can paint them or think of a thousand other things to make them look appealing.

To better organize your space, you can use cardboard boxes to make beautiful drawers to put on your desk. You can these to store papers and things this avoiding clutter on your work area. To make it, you can use elongated cardboard boxes for the so-called framework and for the drawers, you can use cereal boxes. These can be lined with a colourful and nice printed paper. You can also use self-adhesive plastic or cloth to line your boxes.

One of the most environmentally friendly projects is recycling. Every day we throw away so many papers that we no longer need and instead of reusing them or giving them a new life, we generate more garbage. Well in this project, you will find another way to recycle paper and turn it into a gift that grows and grows.


You don’t have to throw your old worn-out t-shirts anymore. You can recycle them to make a rag rug. There are a million ways to do it, but the easiest is to crochet. No, you don’t have to be an expert in crocheting to do this. Just basic skills will do the job. All you need is scissors, old t-shirts and a crochet hook (a large one). Cut up the yarn and crochet to have this handy mat ready in no time.

Cut a magazine into strips and wind them up in the form of a serpentine. As the next step, push the center into the cone shape, varnish with white glue and when it is drying, place the magazine arms (prepared separately), also varnished with white glue. At this time, you also place the head (made from old paper cups) decorated as you like. You can add accessories such as beaded necklaces, hats with magazine strips and you can also make a complete family.
Nowadays, 3D printers are gaining immense popularity. They are being used in almost every sector starting from construction to medicine. However, 3D printers for use at home are also available and you can make many fun DIY projects using the 3D printers, two of which are:

Children love surprises, especially those Kinder Surprise. No, it’s not the chocolate in there that they love the most, but the toy that they will find inside! You can download the files for these 3D printed eggs from AGEP, which are printed with a small toy inside which can be anything from a car to an airplane. The best part is that this egg is entirely articulated once 3D printed. You can always get Flashforge 3D printers to print your DIY’s as they are Child-friendly and are easy to use.

With a 3D printer, you can print the replica models of a whole crowd of locomotives, wagons, and rails. It also attracts your kid as the new thing to play with and this also increases there knowledge. Surely, an excellent gift idea for your kids!
However, before you finally call them off, we want to tell you that there are some unbelievably creative DIY (Do It Yourself) projects that you can do using a lot of this apparently useless stuff. In this article, you are going to learn some great items that you can create using some of these useless items.
You really do not need to be a genius to innovate! Here we will be discussing easy DIY projects most of them made with recycled materials that will help you decorate your home and recycle different materials.
1. Necklace with paper beads

You will need following things:
- Old magazines
- Scissors
- White glue
- Wooden toothpicks,
- A plasticine bar,
- Ruler
- Pen to mark
Steps:
- Cut the papers in long and thin triangular shape strips (with a base of around 2 cm)
- Once you have all the triangles cut out, start by winding (without putting glue) around a wooden toothpick from the widest part of the triangle.
- Keep rolling the paper and as you approach the tip of the triangle, put a few drops of white glue inside the paper.
- Finish rolling and with the glue coming out of the sides, cover the paper bill with your fingers, varnishing it, taking care not to put glue on the stick so that the paper does not stick to the wood.
- Place the beads to dry on a plasticine or cardboard board making sure that they don’t touch each other and let dry for a few hours.
- Take out the sticks and you can now use the beads to create fun necklaces or other accessories. Be creative and experiment with different papers, colours and cuts, etc.
2. Jewelry organizer with egg cartons
 |
| https://www.thecrafttrain.com/ |
3. Cardboard chest of drawers

4. Paper With Seeds

One of the most environmentally friendly projects is recycling. Every day we throw away so many papers that we no longer need and instead of reusing them or giving them a new life, we generate more garbage. Well in this project, you will find another way to recycle paper and turn it into a gift that grows and grows.
Materials:
- Old newspaper
- Colored paper if you want to give the gift some color.
- Flower petals to enhance the nature of the gift.
- Two large buckets.
- Warm water in sufficient quantity.
- Screen or mesh to strain the paper.
- Blender
- Seeds (preferably use small seeds that can be embedded in a thin sheet).
- Place to dry the paper.
- Cookie cutters if you want to give your gift different three-dimensional shapes
- The first thing you have to do is tear the paper. In this step, even the youngest of the house can help. Tear the paper to be recycled into small pieces.
Steps
- Soak the paper.
- Dip the paper in the buckets with warm water and let it soak for at least an hour. If you are going to add colored paper this is the time.
- We liquefy the paper.
- Once the paper is very wet, you can start liquefying it in the blender with enough water to not burden the motor. Blend in small batches and empty in another bucket little by little.
- Once liquefied, you can add the seeds and petals of the flowers, stirring so that they are distributed evenly.
- Strain the dough.
- Pass the mass of liquefied paper through the strainer.
- Squeeze out the excess water from the paper pulp and if you want it flat, you can use an acrylic or wooden board and spread the dough with a rolling pin.
- If you want your gifts to have volume, you can shape them with the cookie molds as long as you do not make them very thick because then the seeds at the center would not be moistened.
- Absorb excess water with a towel or cloth.
- Let your paper dry at least overnight.
- You are not ready to gift these to your friends and family with instructions on how to use these gift papers to grow their own plants
5. Patterned Clay Trays

Materials
- Bakeable clay
- Erasers/keys/jewelry to make patterns
Steps
- You will need to roll out the bakeable clay. The length/diameter etc will depend on how big you want the tray to be.
- Make the desired pattern on the tray with household items, like a key, eraser or any jewelry. Bake the clay and use to tray to keep your keys, stationary or anything you like.
6. Tin Can Utensil Bins

Materials
- Vegetable cans or coffee tins
Steps
- Recycle your vegetable or coffee tins to use them as cutlery or other utensil-storage bins. Make them look colorful with paint, designer printed papers and washi tape.
- As the last step, use a "S" hook to attach these to your kitchen towel bar.
7. Rag Rug from Old T-shirts

8. Dolls from Old Magazines

Nowadays, 3D printers are gaining immense popularity. They are being used in almost every sector starting from construction to medicine. However, 3D printers for use at home are also available and you can make many fun DIY projects using the 3D printers, two of which are:
9. Surprise Eggs

10. Train models

Social Plugin