
How To Submit Application On Apple App Store?
Planning to launch an application on the Apple App Store isn't that difficult and not accessible simultaneously. Before the launch of any app, a lot of time in development and effort is needed, in precise with money.
However, the process of the app on the Apple App Store Submission Service can be complicated. This blog will highlight how to submit the app to the iOS app store with step-by-step guidance. appsubmitter.io helps you release your app, including both iOS and Android.
The Stepping Stones Of App Launch App Service On Apple App Store:
Below are the steps you need to consider important.1. Distribution Provisioning Profile And Certification:
It is imperative to have a separate distribution profile and distribution certificate for the Apple App Store app's hassle-free launch process. You can easily do this through Xcode. It required automatic signing-in efficiency. Thus, Xcode will develop and manage certificates, sign identities, and easily register the device. It can be done automatically, and if not, in some cases, manual signing is also the way to get in through.2. Make an App Store Connect Record For The New App:
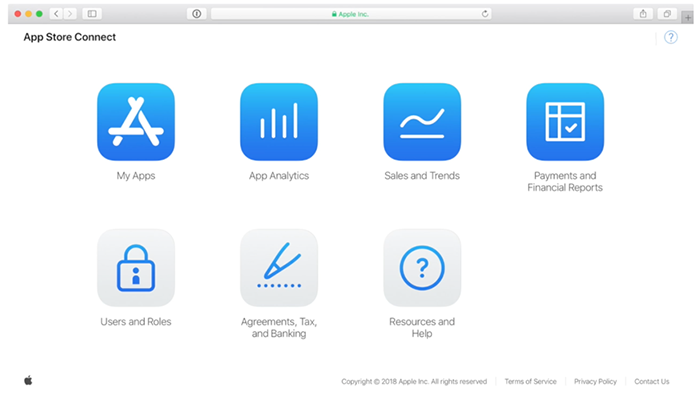
- Just sign in with your Apple ID used as the Apple Developer Program if creating your own App Store Connect is leading you. However, if the organization is invited as a user with admin, technical team agent, or app manager role, go for App Store Connect user login-in.
- Submitting For Paid Apps: If you are to submit a paid app, you need to sign a contract that ensures specific payment terms. If it's free, then just skip it. Be careful to read the agreements, tax, and banking guidelines mentioned on the App Store Connect dashboard, click on the Request Contracts button, and then submit. Make sure to click Set Up in the contact info box for contracts. Next, add your bank account details and tax information for complete processing.
3. Add New App:
In the dashboard time, select My Apps and the (+) sign, which can be seen in the upper left corner, then New App. It is better to keep a new app record in App Store Connect, so add details like platform, app name, default language, bundle ID, and SKU.4. Keep Archives And Upload Your App Using Xcode:
Before submitting your application to review App Store Connect, it is essential to upload it using Xcode. The steps are as follows:- Choose Generic iOS Device.
- Select Product from the menu and click on Archive.
- Xcode Organizer will launch and display Athe archive (if any were created in the past).
- Clicking on Upload to App Store in the right-hand panel is good.
- Go for credentials and choose the one you prefer.
- Next, click on Upload (in the bottom right-hand corner).
- After uploading, you will see a message, then just click Done.
5. Configuration of Application's Metadata:
Add languages, categories, and app privacy policy URLs in the App Store Tab in Connect-App Information. Give your app price trier or free availability. Under the features tab, you can add other required configurations or details like in-app purchases.Thus, when all is set, your app will be marked with a yellow dot and the status "Prepare for Submission." Meanwhile, you can even add the app's screenshots in JPEF or PNG format and save them. Go for other necessary details and app optimization descriptions for more efficiency.
Social Plugin