Ad Code
Translate
Five Do’s For a Healthy Turnover That Bolsters Talent-Retention
October 20, 2025
Smart strategies for trading on crypto exchanges
October 20, 2025
What is Ozempic (semaglutide)? (Updated in 2025)
January 30, 2025
Discover Honeybee Pharmacy (2025 Guide Important Consumer Tips)
October 14, 2025
Posture Bra: Improving Back Support and Comfort
October 20, 2025
How To Find Suitable Properties In Cyprus?
October 20, 2025
10 Effective Strategies to Improve Domain Authority of Your Website
October 20, 2025
How to install peel and stick wallpapers in your home?
Zizo Gala-Mkhize
May 06, 2024

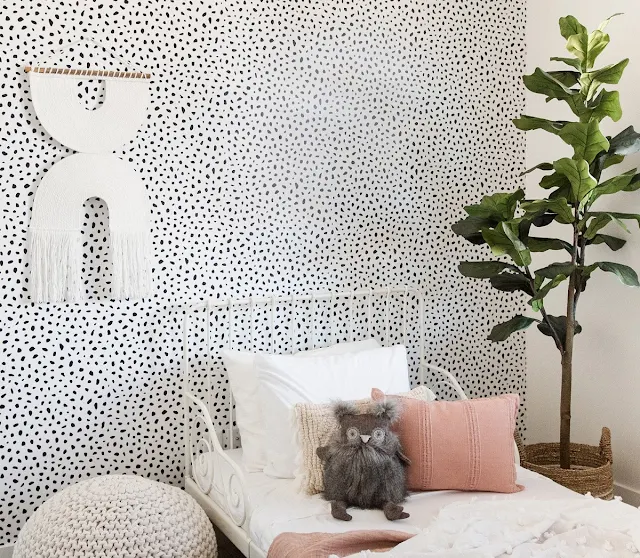
Peel-and-stick wallpapers are the new trend, ready to decorate your home within a budget. These are some of the most versatile and reliable options for upgrading the look of your walls.
In the corporate world, peel-and-stick wallpapers are the only solution for covering the walls, as they need to change the wallpaper every other season. If you want something colorful and versatile for your home, go for peel-and-stick wallpapers. Peel-and-stick removable wallpapers are far better than the difficult-to-install permanent ones. All you need to do is find the best wallpaper expert or consult a reliable interior designer.
If you think that installing this new kind of floral wallpaper will help you, you should study the process. It differs from what it feels like; anyone can install them without hassle. It is a smooth and straight process.
Steps to install the peel-and-stick wallpapers.
Before we start, let us give you a few necessary pieces of advice, too. You should not choose some odd wallpapers. There needs to be a theme for every room. Otherwise, everything will feel confusing because these wallpapers are available in different prints and shades. For instance, you can have the peelable floral print wallpaper for the bedroom and some geometric designs for the dining hall.One needs to know the color scheme and the theme of the room décor. It is not like you cannot change the wallpapers, but it is better to be careful initially.
Collect the tools.
You will need a few essential tools to make it happen. These are easily available from a nearby store. You will need a
- Small plastic spreader.
- A knife.
- Spirit level.
- A large spreader with a metal body and fine edges.
- A paintbrush.
Prepare the walls.
You cannot place wallpaper on drywall. Therefore, you need to ensure that there is enough glue, paint, or any moisturizing material on the wall. This is crucial to making it easier to install the wallpaper accurately in place. Always use the best quality paint to prime the wall and ensure the color is similar to the wallpaper's shade.Mark the walls
It is also important because you might be mixing more than one type of wallpaper, and to know where to install which wallpaper, you should have some marks and spots. Another reason to make the walls is to place the wallpapers on the same line; you must draw them with chalk or something that can be removed or hidden once the wallpapers are installed.You might also need an inch of tape or a scale. Doing it without a measuring instrument will be a disaster.
Measure the wallpapers.
As every home is different in size, we cannot have standard-sized peel-and-stick removable wallpapers. Get an inch of tape, measure the length of the walls and wallpapers accordingly, and mark it.Now, you should trim the wallpapers from the marked point. It would be better not to trim them exactly at that point; you should keep a difference of at least 2 inches. It will help you if the walls are not measured accurately.
Strat installing
Many people think that the first spot where they should place the wallpaper is the extreme corner; this is wrong. Start from the center or slightly farther from the corner. The corner areas could be more perfectly square, and our wallpapers would not fit perfectly. Therefore, you might need to cut some other wallpaper shapes for the corners, and it can be done later once you are done with the center wall.Paste the wallpapers in the same line.
It is extremely important that the wallpapers are in alignment to give your room a clean and tidy look. You should keep a long scale to check if the wallpapers are perfectly aligned. A little difference will look very odd when you analyze the results.You should always paste the wallpapers in a top to bottom fashion. It will be easier; otherwise, your body will touch the pasted wallpaper making it dirty and untidy.
Cut the extra wallpaper.
As mentioned, one should keep the wallpaper a little longer than the required length; therefore, when you have pasted the strips, check the unnecessary wallpaper. Cut it out, and your wall is ready.Featured Post
DL Mining Launches Ethereum Contract Participation Service, Helping Users Earn $2K Stable Daily Returns
Zizo Gala-Mkhize-
October 20, 2025
Soapie Teasers
Sister Sites
Most Popular
List of 6,000+ Dofollow Commentluv Blogs FREE (Updated 2025)
January 16, 2025
Five Do’s For a Healthy Turnover That Bolsters Talent-Retention
October 20, 2025
What is Ozempic (semaglutide)? (Updated in 2025)
January 30, 2025
Popular posts
List of 6,000+ Dofollow Commentluv Blogs FREE (Updated 2025)
January 16, 2025
A Wood-Burning Stove in a Tent: A Guide to Safe Hot Tenting
April 08, 2021
Five Do’s For a Healthy Turnover That Bolsters Talent-Retention
October 20, 2025
Footer Menu Widget
Created By Blogspot Theme | Distributed By Gooyaabi Templates

Social Plugin