Ad Code
Translate
Smart strategies for trading on crypto exchanges
October 20, 2025
Five Do’s For a Healthy Turnover That Bolsters Talent-Retention
October 20, 2025
Discover Honeybee Pharmacy (2025 Guide Important Consumer Tips)
October 14, 2025
What is Ozempic (semaglutide)? (Updated in 2025)
January 30, 2025
How To Find Suitable Properties In Cyprus?
October 20, 2025
Posture Bra: Improving Back Support and Comfort
October 20, 2025
10 Effective Strategies to Improve Domain Authority of Your Website
October 20, 2025
How To Install Your Garage Door Opener DIY
Joseph Nicholls
February 19, 2024
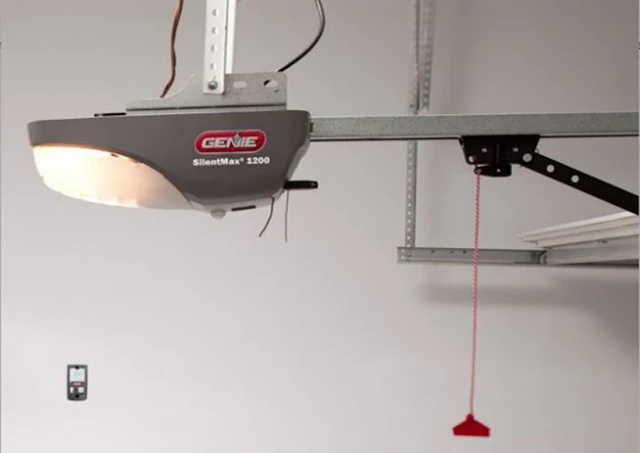
After purchasing a garage door opener, you must check how much you can spend on its installation. If you are already on a budget and do not want to invest much in the installation, you can do the installation on your own. Installing a garage door opener might be complex, but it is not rocket science. The openers come with an instruction manual for installation that you can follow to install the door opener. However, you need to be prepared to spend some time installing a door opener, which can take a good four to five hours.
Some points need to be kept in mind before you start the installation of a door opener on your own. The door opener that you buy should be of high quality. You can check the reviews of different types of door openers on the internet before purchasing your perfect fit. You should also clean the internal gears and hinges and oil them properly so that they can function smoothly. This also ensures that the noise level is minimum.
Step 1: Going through the Instructions Manual
The first step in installing a garage door opener is to go through its instructions manual and the steps and procedure written to install it. You need to understand the steps, and in case something needs to be clarified, most of the door openers come with a customer care service number where you can call and ask away any questions or doubts you might have. Additionally, several online videos containing instructions on installing a door opener are available. You can also check them out.
Step 2: Collecting the Required Tools
The screw is driven, and chain door openers are the most accessible type of garage door openers to install. You need a toolbox with all the necessary tools required to install a door opener. In a DIY door opener installation, some of the basic things you would need are a hammer, screwdriver, wrench, drill driver, tape measure, pliers, ladder, level, etc.
Step 3: Setting the Ladder at Maximum Height
To install an overhead door opener, you must first ensure the ladder has been set to its maximum height. This will help to negate any need to carry out this work above the head, avoiding accidents. You should be careful while you install the wiring- you can take the help of a professional if required. It is also essential to ensure that the system of manual disconnect is there in case something goes wrong. It is better to install it where children cannot reach.
Step 4: Removing the Old Unit
First, to remove the old unit, unplug the old one. Further, lose the bolts that are holding the old unit in place. Take note that you have one hand supporting it while you remove the bolts. This would ensure that the unit does not suddenly come down, leading to accidents. This also ensures that you can lower the unit slowly.
Step 5: Removing the Bolts
After you have removed the unit after unplugging it, the next step is releasing the two bolts that connect the motor and the track.
Step 6: Reconnecting the New Opener
Moving further in installing a garage door opener, you need to reconnect the track with the new motor.
Step 7: Reconnecting the Chain
After you have followed these steps, the next step in the installation process is reconnecting the chain with your hand.
Step 8: Adjusting the Garage Door
It is crucial to ensure that you build garage is within budget and the door is connected correctly and adjusted. The off-the-shelf door openers are well-gauged; you can face problems with some new devices because of their under-coiled or over-coiled springs. If the garage door is not adjusted correctly, it is better to call a professional. The torsion springs store a lot of kinetic energy, and thus, you might need help to adjust the spring system on your own. You must be careful at this step, as any callousness can lead to injuries or accidents.
Step 9: Checking the Reverse System
After the installation, it is always good to ensure the reverse system is working correctly. You can put a brick or block of wood below it to check. Check out the reverse system by activating the door opener. It should stop and reverse after it senses the obstruction. This needs to be checked several times after installation, as this is one of the main functions of a door opener. Ignoring this step is not advisable, as it can be hazardous for you and your family when you use it.
Featured Post
DL Mining Launches Ethereum Contract Participation Service, Helping Users Earn $2K Stable Daily Returns
Zizo Gala-Mkhize-
October 20, 2025
Soapie Teasers
Sister Sites
Most Popular
List of 6,000+ Dofollow Commentluv Blogs FREE (Updated 2025)
January 16, 2025
Five Do’s For a Healthy Turnover That Bolsters Talent-Retention
October 20, 2025
What is Ozempic (semaglutide)? (Updated in 2025)
January 30, 2025
Popular posts
List of 6,000+ Dofollow Commentluv Blogs FREE (Updated 2025)
January 16, 2025
Five Do’s For a Healthy Turnover That Bolsters Talent-Retention
October 20, 2025
Smart strategies for trading on crypto exchanges
October 20, 2025
Footer Menu Widget
Created By Blogspot Theme | Distributed By Gooyaabi Templates


Social Plugin